
We all have a cyclist friend who, when going on a mountain route, carries such a huge backpack that it looks like they're going on a week-long trip. Others, on the other hand, never carry more than a simple bag to store their mobile phone. It's not easy to choose the tools and accessories to pack in your backpack when you go cycling, since the number of incidents that can arise is varied. So, is it better to be prepared to face any adversity that may happen in the middle of the countryside, or better to relax in the face of the impossibility of being ready for everything? In this article, I will talk about all those indispensable tools and accessories for any bike ride, whether on the road or mountain. The goal is to be self-sufficient to avoid getting stranded in the middle of the mountains or at the mercy of the charity of another cyclist who can lend us a hand.
Multitool with chain breaker
The multitool for the cyclist is like the Swiss army knife for the mountaineer. It's a practically mandatory accessory with which to solve the most minor mechanical issues, but no less common for that. Who hasn't had a derailleur screw come loose or a cleat move on their shoe? There are many types of multitools.

Image: Deporvillage
In the case of the bicycle, it is advisable that it includes a screwdriver, different sizes of Allen and Torx keys, and also a chain breaker. If it doesn't have a chain breaker, we should carry one separately, since chain breaks are one of the most frequent breakdowns.
👉 The five most common incidents when you go mountain biking
Tire levers
If we had to change an inner tube due to a puncture, we need tire levers to remove the tire. They are usually sold in packs of 3, but if you're a bit handy, carrying 2 is enough. A tip: it is preferable to use the tire levers only to remove the tire. To put it back on, I recommend doing it by hand, since most inner tube pinches—which can cause future punctures—are caused by mounting the tires with the levers. There are cheap tire levers on the market, but they are not practical. They are usually made of poor-quality plastic and end up bending or breaking at the slightest occasion.
Quick link
One of the most common breakdowns, especially in mountain biking , it is the breaking of the chain due to poor lubrication, applying force to the pedals while shifting gears, or from an impact with rocks, bushes, and other elements. The best option to fix this breakdown is to use a chain breaker, remove the damaged link, and install a quick link. With a chain breaker and a quick link, we can fix this issue in a couple of minutes. However, it is advisable to learn how to use it. It's not particularly complicated, but it's always better to practice one day at home in peace with an old chain, without rushing, without cold, rain, or mud.
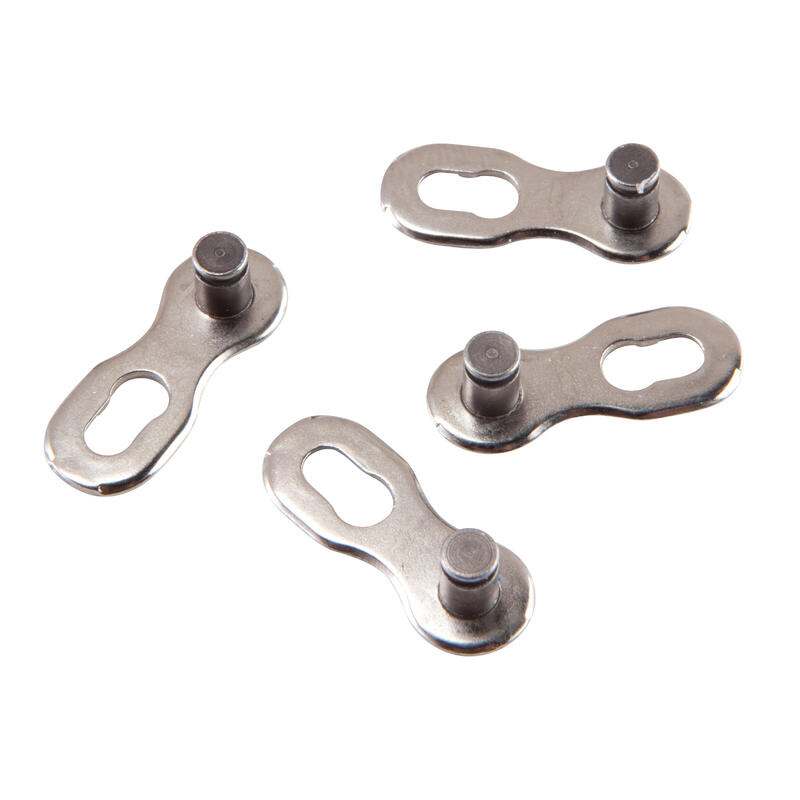
Image: Decathlon
We will learn better and thus avoid our first time being a nightmare. Keep in mind that, just as each cassette requires a different chain, there are no universal quick links. We must carry the one that matches our chain. So, before buying a quick link, make sure it is compatible with the chain on your bike.
Derailleur hanger
The hanger is the part that serves as an anchor between the frame and the derailleur. But it also has the mission of protecting the derailleur and the frame in case of a hit or mishap, so that the hanger absorbs the tension. If one of these elements must break, let it be this one to minimize damage. If the hanger breaks during a ride and you do not have a spare, the only thing you can do is remove the derailleur, shorten the chain, and ride home in single speed mode. Until quite recently, each bicycle model had a different hanger. But recently SRAM has launched a universal derailleur hanger for their mountain groupsets: the SRAM Universal Derailleur Hanger.
Air pump or CO2 cartridges
Another of the most common breakdowns—and a real nightmare when it happens several times—is a flat tire. That’s why it is absolutely essential to carry an inflator pump. Nowadays, you can find very small and convenient pumps on the market to carry in your jersey, inside a tool bottle, or attached to the water bottle cage.
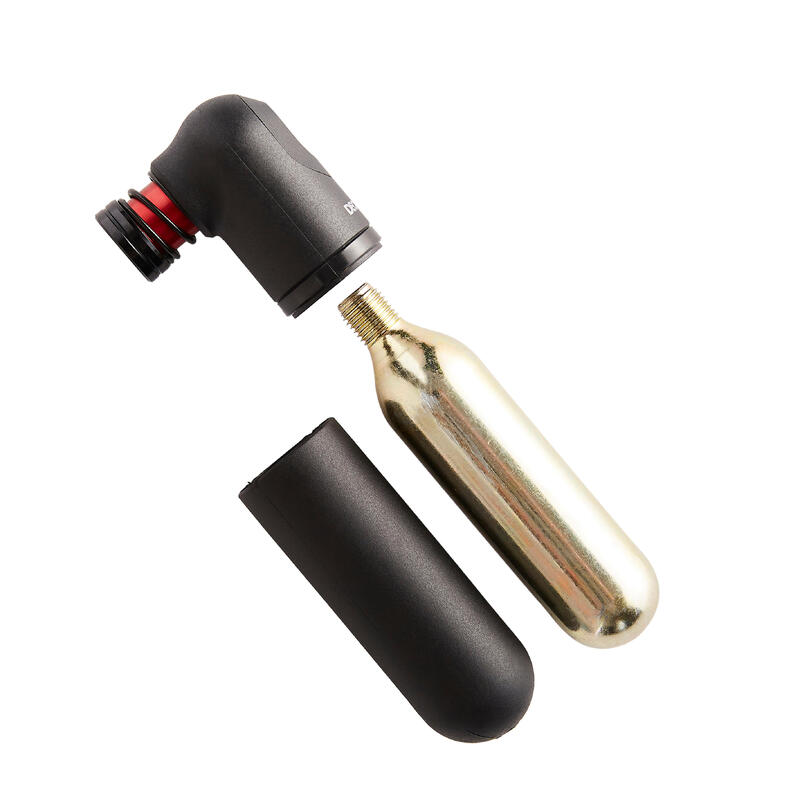
As an alternative to the air pump, there are CO2 cartridges or canisters. They are ideal for races where you don’t have time to waste, as you can inflate the tire in 4 or 5 seconds. You have to consider what type of wheels you want to use them for, as there are several types of canisters: 12, 16, 20, and 25 grams. Depending on the type of cartridge you buy, each use can cost you between €1 and €6.
Tubes, patches, and plugs
It is always advisable to carry a spare tube, even when we ride with tubeless tires In addition to the inconvenience of getting a flat tire in the middle of a ride, there is always the risk that the tire will tear and the tubeless sealant will not be able to close the hole.
👉 The advantages of using tubeless wheels on a mountain bike
It is also advisable to carry a small puncture repair kit that includes patches, glue, and sandpaper, whether you use tires with an inner tube or tubeless wheels. Can you imagine your tire tearing, you put in the tube, and you get another flat? Well, it's more common than you think.
👉 Tubeless wheels for road bikes: everything you need to know
Don't forget to complete the puncture repair kit with a set of plugs. These are used to seal holes or tears that occur in the tire and that the tubeless sealant cannot cover. There are brands like Samurai that sell bar end plugs for handlebars that have the plugs built in.
Cable ties
A lifesaver that doesn't weigh anything, doesn't take up space, and can help you out in the strangest breakage situations that might occur is to carry a few cable ties. For example, in my case, they saved me in a carrera. The boa closure on my shoe got caught on a branch and flew off. What I did was use a couple of cable ties as improvised shoelaces.

Image: Amazon
A good place to store them can be in the tool pouch or in the handlebar of the MTB bike; remove the bar end plugs and put them inside the handlebar. That way you'll never remember them until you need them.
A rag
Yes, just as it sounds. Although it may seem strange, it's always a good idea to carry an old rag to clean yourself. Or do you want to finish the day with your hands full of grease because you fixed the chain in the middle of the ride? Also, it's very practical for wrapping all the tools inside the pouch or accessory we use to carry them on the bike. This way, we prevent them from banging against each other and making noise.
Where do we store all this?
There are many options for storing all our tools, but probably the two most commonly used are:
-
Tool bottle: These are cartridge-shaped bottles that are very convenient and can be placed in the bike's second bottle cage.
- Tool bag: These are zippered cases that are placed under the saddle. Depending on the model, they will be attached to the saddle rails and the seatpost.
Although it may seem like a lot of items, if you organize them well they don't take up much space and don't add a crazy amount of weight. The most important thing, without a doubt, is to be self-sufficient in case of an incident so you can continue your ride and avoid getting stranded in the middle of the mountains or in the middle of a ride on a road bike.